Here we are at Spinspiration, Kelly and I sharing our love of fibres and spinning. I have copied across my blog post from recently to start us off with some hints and tips I have found useful and some useful websites. We would love you to join in and share your spinning experiences however long you have been doing it, or join in if you are interested in spinning in the future.
~ ~ ~ ~ ~
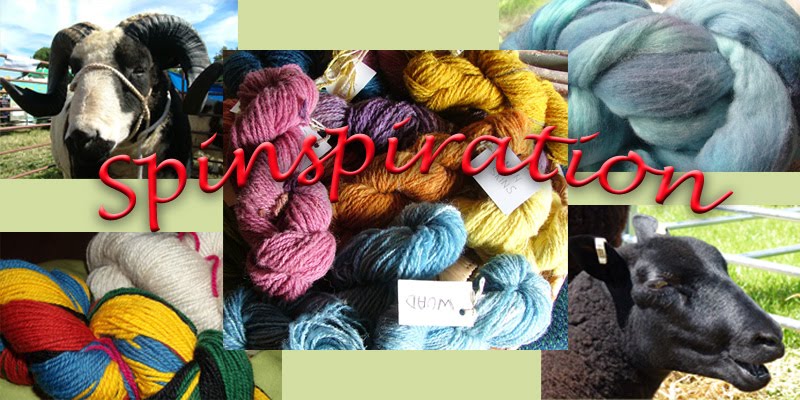
So remember the bobbins from the other day? Beautiful Zwartble spun mostly by myself with a little help from Imogen.
I meant to take a close up of the singles on the bobbin but forgot. With both of these bobbins I decided to Navajo ply the wool, this makes it a lovely 3 ply yarn just from one single and is a lovely way to ply, often used when doing colour work as this method of plying keeps the colours looking good rather than plying with another bobbin and creating more variety. I've done it with this as I want this to be a quite chunky yarn and I spin quite thin singles generally.
There is a great video tutorial for Navajo plying here, it takes a little getting used to but once you have mastered it, it is easy to do. There are other videos but I think this one explains and demonstrates it well. It basically uses a loop and you draw the single through the loop - a bit like a crochet chain stitch, and continue to do that - drawing the single through the loop and pinching and releasing the yarn in front as it is plying (with the spinning wheel spinning in the anti-clockwise direction).
Here it is, plied and wound off the bobbin onto the niddy noddy, and tied at four points with a figure of 8 tie of contrasting wool (I use acrylic so it doesn't blend or felt onto it) - this helps stop the strands tangling when you come to wash it and then wind it up into a ball.

Navajo plied zwartble yarn
The next picture is some previous spinning, washed and waiting to be made into lovely balls of yarn. Not sure what to use these for yet as they are odd balls now as the fleece is all used up. The zwartble is going to last a while though so a bigger project for that one I think, just got to decide what.

Zwartble (grey) Jacobs (humbug) Dorset horn (cream) Portland (white)
So tips and all that, for all those new spinners out there (you know who you are) - there are some great video tutorials on the internet if you get a little stuck and it's a while before your next spinning meeting.
This is a great site for advice (and pictures) and some videos - Joy of Handspinning . This is a good basic how to spin, how to control the wheel video here. I also think the Ruth MacGregor videos are good (carding, short draw and long draw) - no words though but set to lovely music, and you can pick up what she is doing and there are written words every so often. Hope some of these help. Alex has pointed out that a glossary of terms would be useful too - here's one on our Guild website, and another comprehensive one here - actually that's another good website of how-to.
Tips are probably hard to explain in writing, much easier to pick up when you are with someone guiding you but I'll have a go at a few:
- Practice treadling with no wool on the bobbin, get your rhythm consistent - not having to battle with the wheel going backwards when you introduce wool will be easier once you have the rhythm of your wheel. Slow and steady - learn to recognise how slow you can go without it reversing.
- The single biggest tip that helped me when I was learning was to pinch the wool going through the orifice to stop the spin going up into the rolag or batt of wool (whatever you're spinning from). I knew nothing when I bought my wheel but found the lovely people at the Guild and found one of the members taught and got myself on her lessons. Very thorough and very experienced - learnt all about the wheel and sheep and different qualities of wool from different parts of the sheep. But the pinching of the wool was either not mentioned or I didn't hear it. But the very next day I had booked onto a one day course with an experienced spinner and learnt loads more, and this "pinching" was the best advice - I was away ... "a natural" in her words and came home from that buzzing and with two skeins of plied washed wool. So long story - short conclusion - pinch the wool in front of the rolag and don't release until you have drafted (pulled) back the rolag - then I gently follow the spin in the wool back to where I want to and pinch again. Pinch and release.
- If it starts going out of your control - stop! Stop the wheel and recover. If the spin has gone into the roving, stop and untwist the rolag if you can or break off and rejoin.
- Bet confident at short draw spinning - push and pull a little at a time (also called inchworm) before trying long draw. Although long draw has it's benefits (more consistent even yarn), it can be frustrating when learning.
- When you lose your end - fibre breaks and the end winds onto the bobbin - it can sometimes be hard to find it. A small piece of masking tape can help you find it. Edited to add: wrap a little masking tape around your finger and run it gently along your spun wool on the bobbin and the loose end will stick to it so you can re-thread it through the orifice with your threading hook.
- Remember to stop from time to time to check where the wool is winding on and change the yarn to another hook as necessary (unless you have a lovely fancy wheel with a sliding hook flyer!)
I will think about any more tips I can share, hope these help - not sure if I can explain them well enough in writing, but hopefully it makes some sense.
So what are you spinning? Share your pictures, don't be shy, would love to see your work whether you're new to spinning or experienced. I'll share with you this which was my first effort in spinning from the archives!


first spinning an plying
And this after my Spinning Day tuition where everything just clicked.


See it does get easier and better with time and practice.
Dawn x